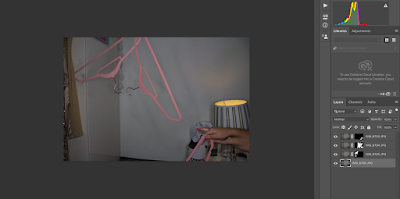
Sequencing
Techniques e.g. “wide angle close up technique” (create labels: techniques, Sequencing technique).
Definition of the technique
By definition, a sequence is a serial arrangement in which things follow in logical order or a recurrent pattern. Photo sequencing is actually stitching multiple images together and it is a form of time-lapse photography. A change in an object’s position over time is being displayed and it only works when the object moves across a static background.
An image which illustrates the technique
Equipment and settings
1.Tripod
2.Fast
shutter speed
3.Manual
camera settings (to fix the exposure)
4.Manual
focus
5.No
Camera shake (be careful when pressing the button).
6.Direct
the shoot (composition/framing and where the moving elements will move from and
to are important.
7.Photo-editing
software
To create a photosequence, you will need to follow the set
procedure.
1.
Open the selected files (it is recommended that
you have between four and 5 images with a clear separation of subject (that is
moving) so that there are no overlaps.
2.
Ensure that the background does not move as this
will make the compositing task more difficult, you were asked to use a tripod
3.
Copy the second image that you want to add to
the initial background image by using the key commands (Ctrl+ C) and then paste
(Ctrl+V) the image onto the background
image.
4.
Repeat the procedure for the third, fourth and
fifth file.
5.
Create a layer mask
6.
For each layer fill the layer mask in black
7.
Use the Brush tool B and paint using white with
the opacity and fill for the brush set to 100%
8.
Paint one each of the masked layers (in white to
reveal the moving object)
9.
Once all of the layers are painted you will have
a sequence.

The equipment I used to create a sequence included a tripod a Canon DLSR and the use of photoshop. I took the a few different shots of a sequence until I got one I was happy with. I then took my two favourite sequences to then edit in photoshop. This was done by creating a layer mask for each image and then using the pen tool to draw in the object of the sequence. I repeated this until the final image was produced. Next time I would improve my image by trying to use other objects and creating more frames for a longer sequence.
Progression -
I don't think I will use this technique in my investigation as I don't think it links in well to what I intend to investigate. However I may experiment with a shoot and see what the outcome is like.


No comments:
Post a Comment